Crispy Chicken Thighs with Aioli
Highlighted under: Cozy Comfort Meals
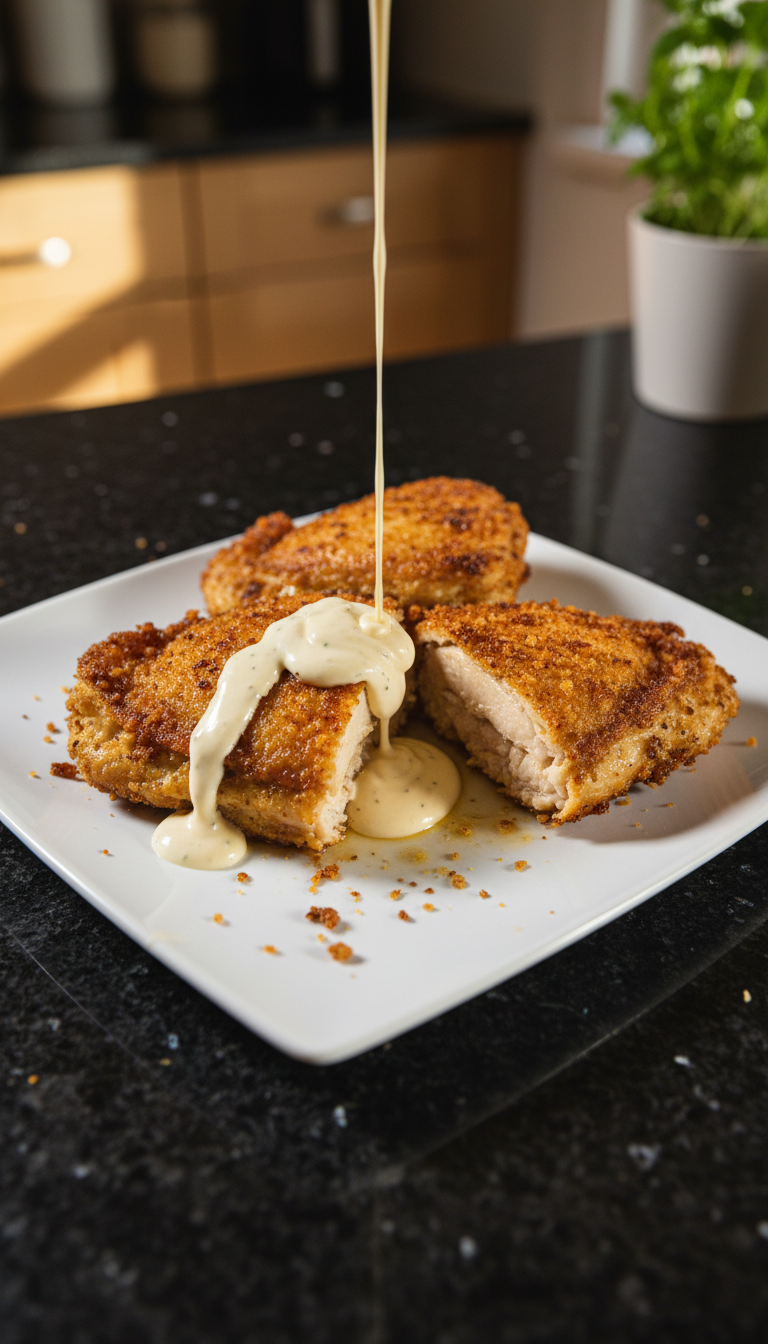
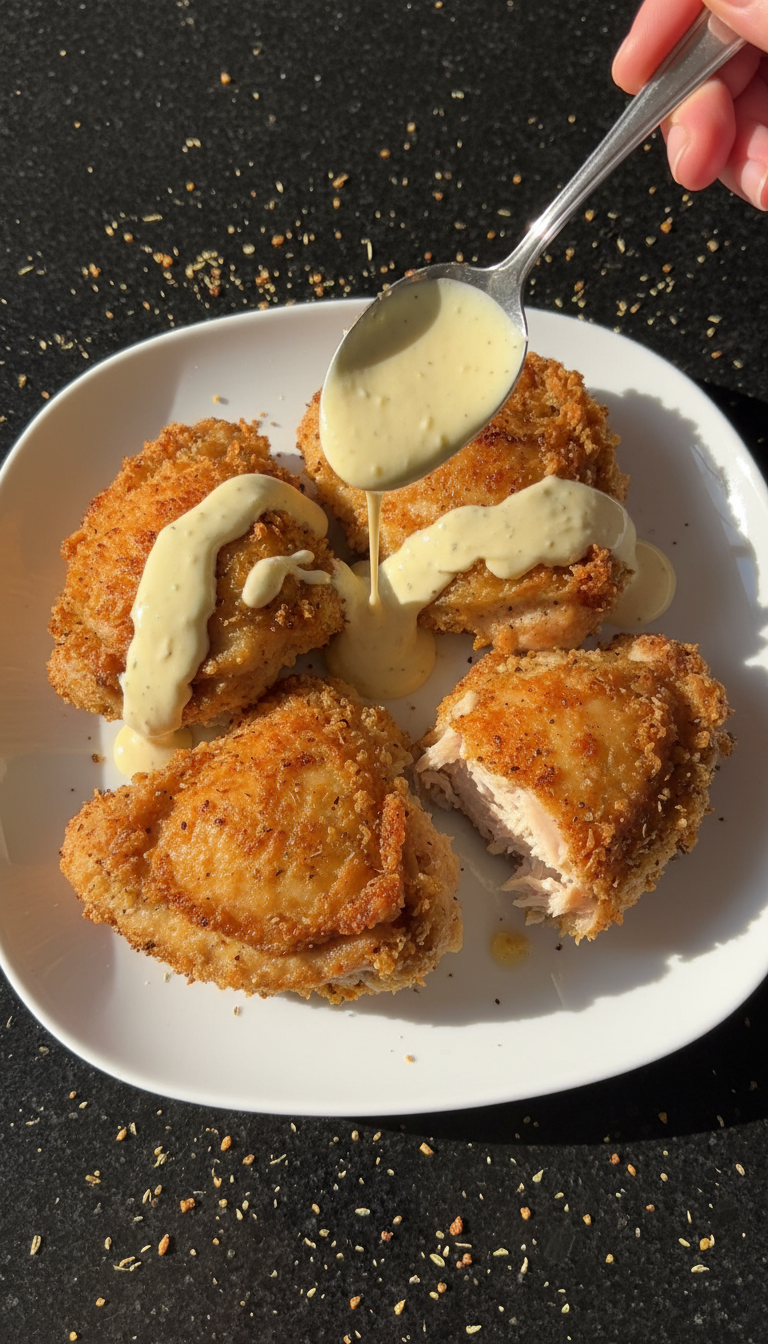
I love making crispy chicken thighs with aioli because they are incredibly satisfying and bursting with flavor. The crispy skin paired with the rich, creamy aioli elevates a simple dish to a gourmet experience. Cooking the chicken thighs slowly ensures that the meat remains juicy, while the skin develops that coveted crunch. Whether it's a family dinner or a casual gathering, this dish has become a staple in my home because it never fails to impress. Plus, it’s surprisingly simple to prepare, making it a go-to for busy weeknights.
When I first attempted crispy chicken thighs with aioli, I was hesitant about achieving that perfect texture I craved. However, I discovered that using a cast-iron skillet really makes a difference. It retains heat beautifully, allowing the skin to crisp up while keeping the meat tender and juicy.
Another tip I learned is to let the chicken thighs rest after cooking; this helps the juices redistribute, ensuring each bite is packed with flavor. Making the aioli using fresh garlic and a touch of lemon adds a wonderful brightness that complements the rich chicken perfectly.
Why You Will Love This Recipe
- Juicy, tender meat under a perfectly crispy skin
- Rich, homemade aioli that adds a gourmet touch
- Simple ingredients with big flavor payoff
- Versatile dish that pairs well with a variety of sides
Mastering the Art of Crispy Skin
Achieving that deliciously crispy skin on chicken thighs is all about the technique. Start by ensuring your chicken is pat dry before seasoning. This removes excess moisture, which can interfere with crisping. Additionally, using a cast-iron skillet not only retains heat well but also helps in creating a uniform crust. Searing the chicken skin-side down for 5-7 minutes on medium-high heat allows the fat to render beautifully, creating a golden, crunchy exterior you'll adore.
Another tip for perfect skin is to avoid overcrowding the pan. If you’re searing more than a few thighs, consider working in batches. This way, each piece has enough space to sear without steaming. After searing, flipping the thighs and finishing them in the oven at 400°F (200°C) ensures that the skin stays crisp while the meat cooks through. You’ll know it’s ready when the internal temperature hits 165°F (74°C) and the juices run clear.
Elevating Aioli: Simple Yet Sophisticated
The homemade aioli is a game-changer for this dish. To achieve the right balance of flavors, make sure to use fresh garlic, as it brings a vibrant punch. When combining the ingredients, whisk them until the aioli has a creamy, smooth consistency. If it seems too thick, adding a splash of water or an extra squeeze of lemon juice can help achieve your desired texture. Taste as you go; a little extra salt might be just what it needs for a flavor boost.
If you want to experiment, try adding herbs like dill or parsley for a lively twist to the aioli. These herbs can enhance the Mediterranean flavors of your dish and complement the smoky paprika used on the chicken. Store any leftover aioli in an airtight container in the fridge for up to a week, making it a fantastic condiment for sandwiches or salads as well.
Serving Suggestions and Variations
Crispy chicken thighs are incredibly versatile. Consider serving them alongside a refreshing arugula salad drizzled with a light vinaigrette for a contrast to the richness of the aioli. Roasted vegetables, such as Brussels sprouts or carrots, are also excellent companions. The caramelization adds another layer of flavor that pairs well with the chicken's crispy skin.
For those seeking different flavor profiles, experiment with spice blends for the chicken, such as adding a touch of cumin or cayenne pepper for heat. You can also swap out the aioli for a yogurt-based dip seasoned with herbs for a lighter option. Don't hesitate to adjust cooking times and temperatures if you're working with different types or sizes of chicken pieces to maintain that juicy interior while achieving the same delightful crunch!
Ingredients
For the Chicken
- 4 chicken thighs, bone-in and skin-on
- 1 tablespoon olive oil
- Salt and pepper, to taste
- 1 teaspoon garlic powder
- 1 teaspoon smoked paprika
For the Aioli
- 1/2 cup mayonnaise
- 2 cloves garlic, minced
- 1 tablespoon lemon juice
- Salt and pepper, to taste
Instructions
Cooking Instructions
Prepare the Chicken
Preheat your oven to 400°F (200°C). In a bowl, combine olive oil, salt, pepper, garlic powder, and smoked paprika. Rub this mixture all over the chicken thighs, making sure to coat them well.
Sear the Chicken
Heat a cast-iron skillet over medium-high heat. Once hot, place the chicken thighs skin-side down and sear for about 5-7 minutes, until the skin is golden brown and crispy.
Roast in the Oven
Flip the chicken thighs, then transfer the skillet to the preheated oven. Roast for 25-30 minutes, or until the internal temperature reaches 165°F (74°C).
Make the Aioli
While the chicken is roasting, mix together the mayonnaise, minced garlic, lemon juice, salt, and pepper in a small bowl. Adjust seasoning to taste.
Serve
Once the chicken is done, let it rest for 5 minutes before serving. Pair with the homemade aioli and your favorite sides.
Enjoy Your Meal!
Pro Tips
- For an extra touch, sprinkle fresh herbs like parsley or chives over the chicken before serving. This adds color and a fresh flavor that complements the aioli beautifully.
Storage and Reheating Tips
After serving your crispy chicken thighs, any leftovers can be stored in an airtight container in the fridge for up to three days. To maintain the skin's crispiness, consider sautéing the thighs in a skillet over medium heat rather than microwaving them. This will help to revive the crunch that makes this dish special. If you're in a hurry, a quick blast in the microwave might suffice, but the texture will be softer.
If you're looking to extend the shelf life of your chicken, you can freeze it for up to three months. When freezing, wrap each piece tightly in plastic wrap and place it in a freezer-safe bag with the air pressed out to prevent freezer burn. For best results, reheat thawed chicken thighs in the oven at 350°F (175°C) until warmed through, ensuring they remain juicy.
Dietary Considerations and Substitutions
If you're looking to make this recipe gluten-free, you’re in luck! The ingredients listed contain no gluten, making your crispy chicken thighs a great option for those with gluten sensitivities. For the aioli, if you wish to avoid egg, vegan mayonnaise can replace traditional mayonnaise without sacrificing creaminess or flavor.
For a lower-fat version, you can trim excess skin and fat from the thighs before cooking. Additionally, using skinless thighs will reduce the overall fat content, although this may lead to less crispiness. To boost the dish’s health quotient, consider adding a side of quinoa or brown rice, which pairs beautifully with the chicken and aioli while adding wholesome whole grains to your meal.
Questions About Recipes
→ Can I use boneless chicken thighs?
Yes, boneless chicken thighs can be used, but adjust the cooking time to ensure they are cooked through.
→ What can I serve with crispy chicken thighs?
These thighs pair well with roasted vegetables, a fresh salad, or creamy mashed potatoes.
→ How long can I store leftovers?
Leftover chicken thighs can be stored in the refrigerator for up to 3 days. Reheat in the oven for the best results.
→ Can I make the aioli ahead of time?
Yes, the aioli can be made a day in advance and stored in the refrigerator. Just give it a quick stir before serving.
Crispy Chicken Thighs with Aioli
Created by: The Yumcanvas Team
Recipe Type: Cozy Comfort Meals
Skill Level: Intermediate
Final Quantity: 4 servings
What You'll Need
For the Chicken
- 4 chicken thighs, bone-in and skin-on
- 1 tablespoon olive oil
- Salt and pepper, to taste
- 1 teaspoon garlic powder
- 1 teaspoon smoked paprika
For the Aioli
- 1/2 cup mayonnaise
- 2 cloves garlic, minced
- 1 tablespoon lemon juice
- Salt and pepper, to taste
How-To Steps
Preheat your oven to 400°F (200°C). In a bowl, combine olive oil, salt, pepper, garlic powder, and smoked paprika. Rub this mixture all over the chicken thighs, making sure to coat them well.
Heat a cast-iron skillet over medium-high heat. Once hot, place the chicken thighs skin-side down and sear for about 5-7 minutes, until the skin is golden brown and crispy.
Flip the chicken thighs, then transfer the skillet to the preheated oven. Roast for 25-30 minutes, or until the internal temperature reaches 165°F (74°C).
While the chicken is roasting, mix together the mayonnaise, minced garlic, lemon juice, salt, and pepper in a small bowl. Adjust seasoning to taste.
Once the chicken is done, let it rest for 5 minutes before serving. Pair with the homemade aioli and your favorite sides.
Extra Tips
- For an extra touch, sprinkle fresh herbs like parsley or chives over the chicken before serving. This adds color and a fresh flavor that complements the aioli beautifully.
Nutritional Breakdown (Per Serving)
- Calories: 420 kcal
- Total Fat: 30g
- Saturated Fat: 5g
- Cholesterol: 130mg
- Sodium: 600mg
- Total Carbohydrates: 2g
- Dietary Fiber: 0g
- Sugars: 0g
- Protein: 32g